
TLDR: I use ML model predictions for photo depth and foreground saliency to highlight the subject(s) of interest against a soft background. Sample results below. Code is here.


a focus on depth
When light enters a camera through a tiny area (a.k.a high-aperture), the captured image has a high depth-of-field (DOF). This is typical for smartphones/action cameras that have tiny sensors or even interchangeable lens cameras paired with telephoto lenses that limit the amount of light that eventually gets through. In these photos you'll notice that every part of the frame is in focus. It is detailed everywhere, and as a result can appear distracting or busy when there is a particular subject of interest in the frame. This is one of the reasons that bokeh is widely liked. But you need big expensive low-aperture lenses to transform background detail into silky color gradients. Maybe ML can help us approximate this and do even more without the expensive hardware. <drumroll>.
problem
While making a photo scrapbook for a special someone I realized that most of my pictures are from the smartphone, all high DOF images. This was disappointing. Let me explain. Our eyes gravitate to areas in focus (detail). When the entire image is sharp, the hint is that everything in the picture is important and needs attention. But most of our photos have a clear subject of interest in the foreground. Ideally we can shine focus on the subject and remove detail from the background so that the cognitive overhead of parsing the picture is minimal. The only purpose the background serves IMO is to provide some context to place that memory. Ideally the background in the resulting image will look dreamy and the processing won't look janky.
limitations of existing approaches
Modern smartphones can apply on-device ML models to blur background for portrait photos. But the results are hit or miss, and come with compromises - speed, quality of output, limited applicability (only for human faces and in some cases pets) and added crop factor. As a post processing step however, we are not constrained by hardware, energy or time constraints and can overcome the above mentioned issues. Most importantly, I already have a repository of raw images that come from a variety of sources - a go pro, a smartphone and a mirrorless ILC.
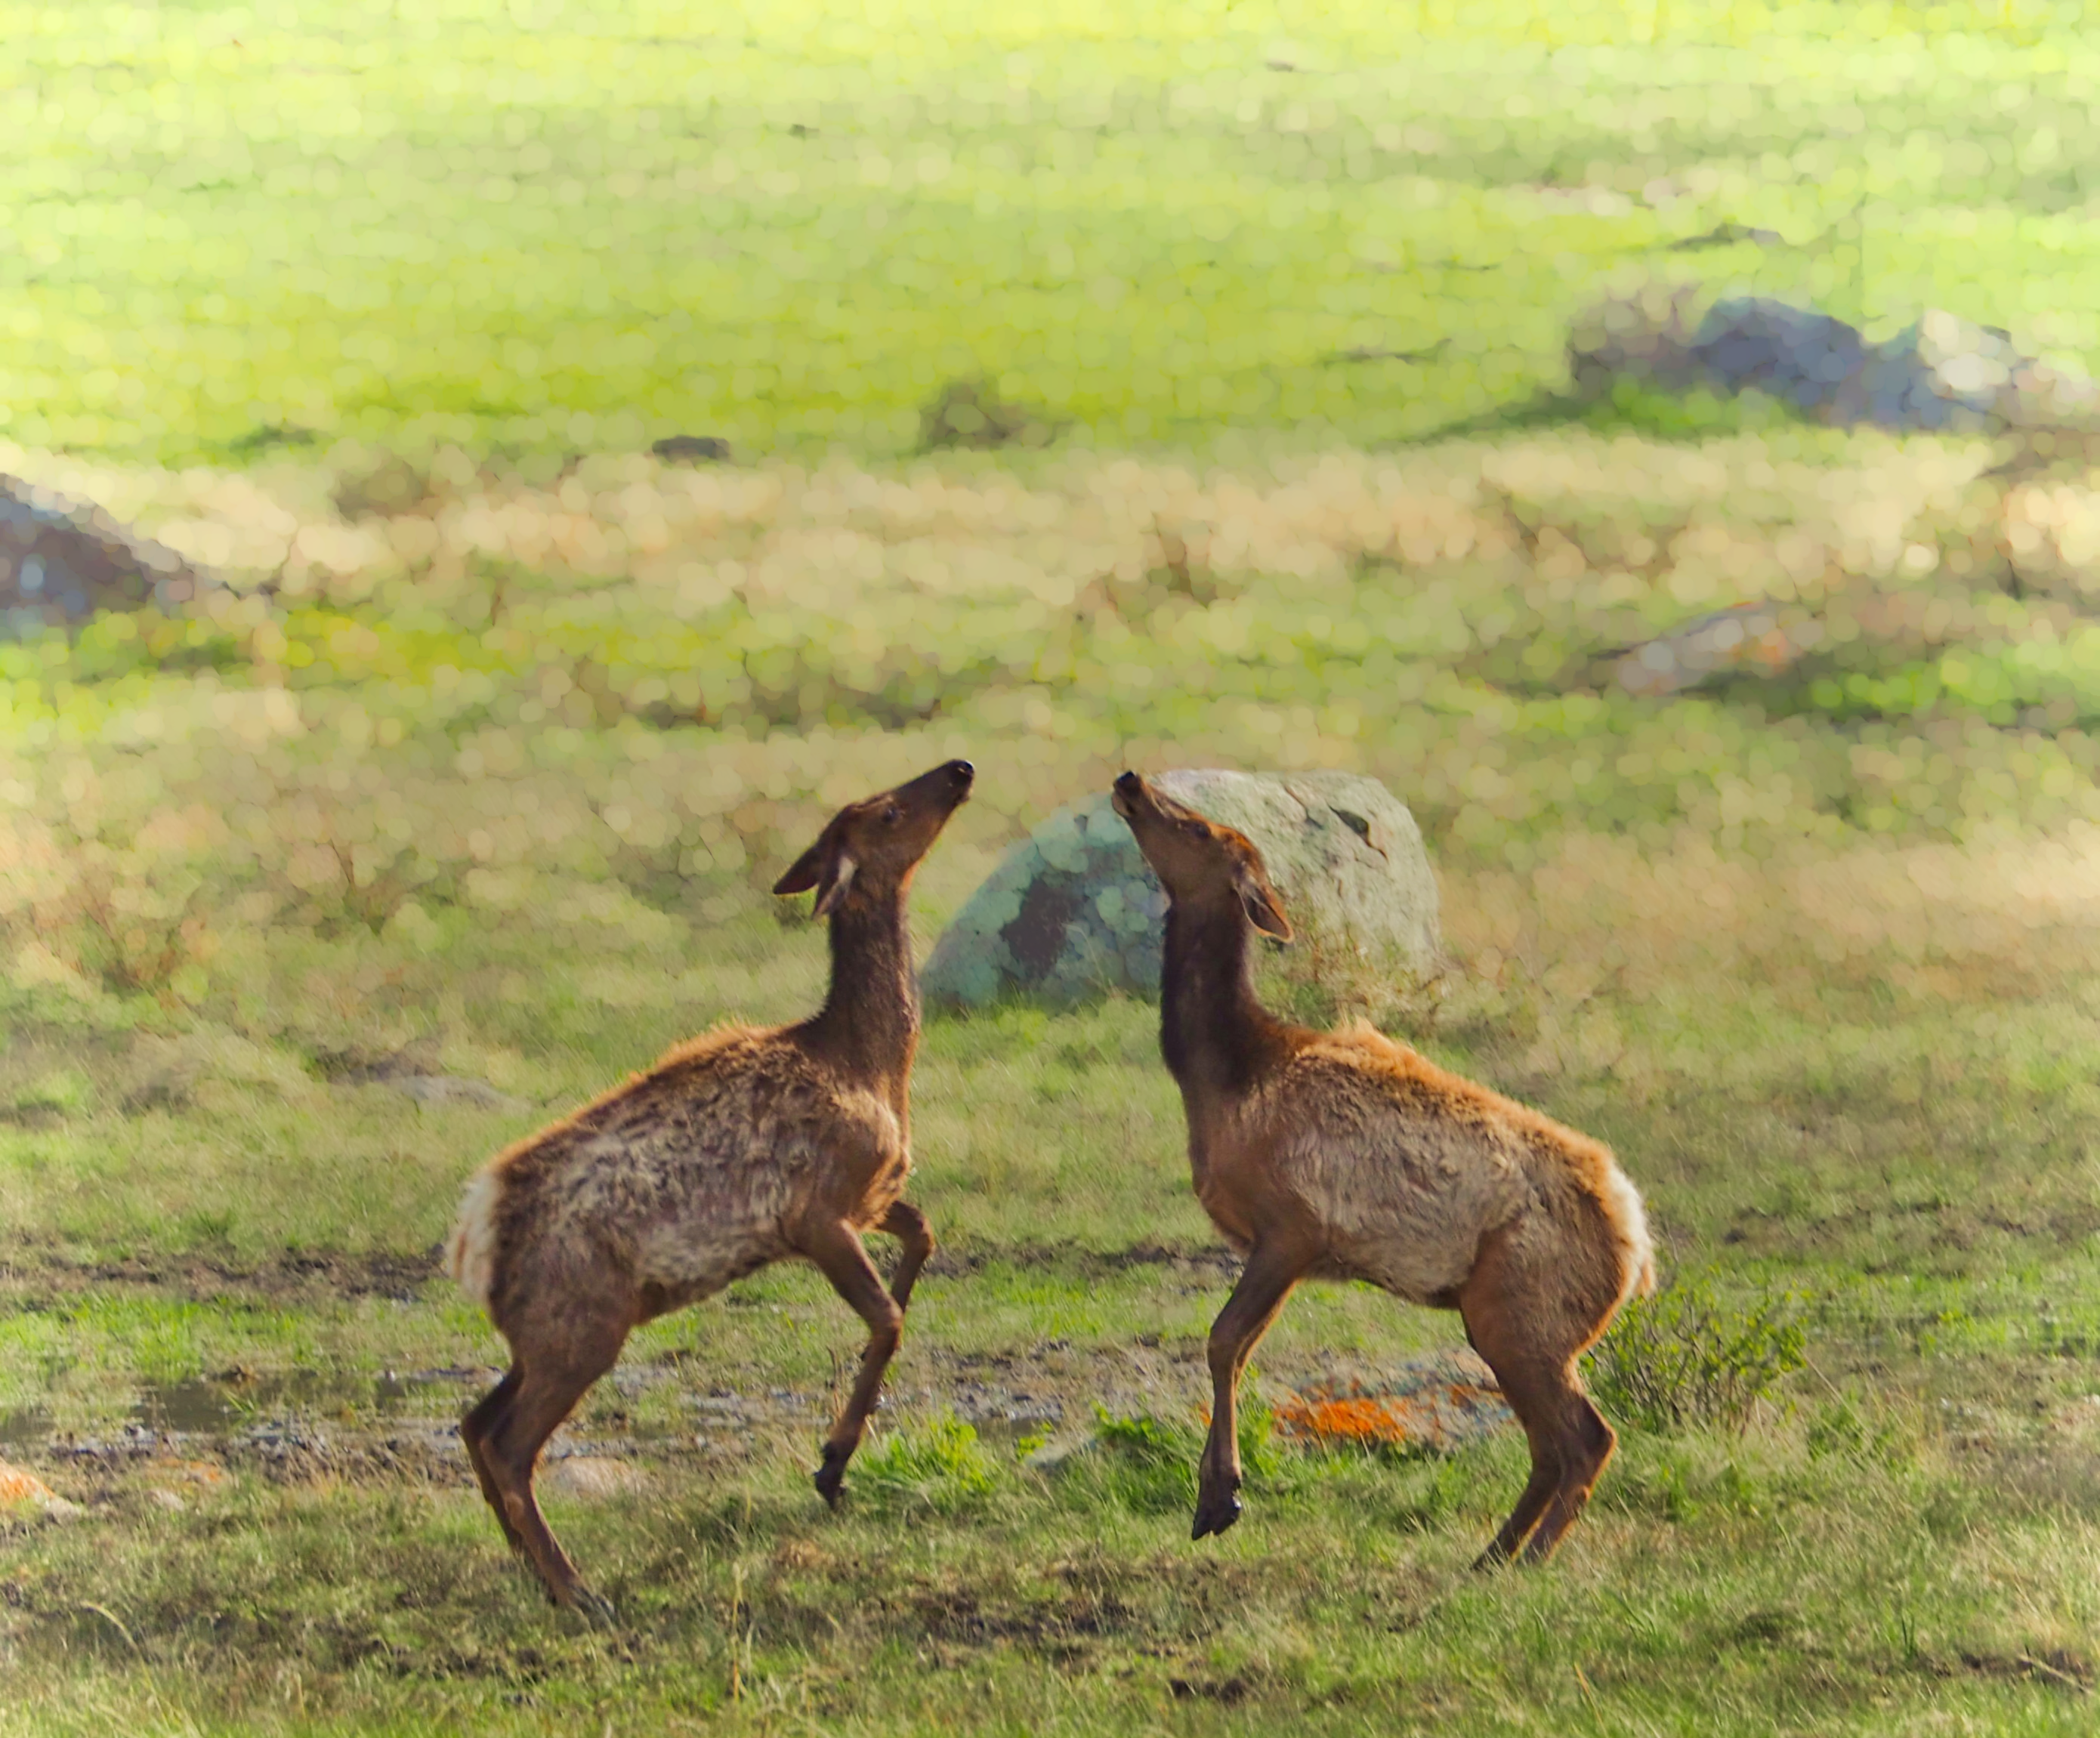
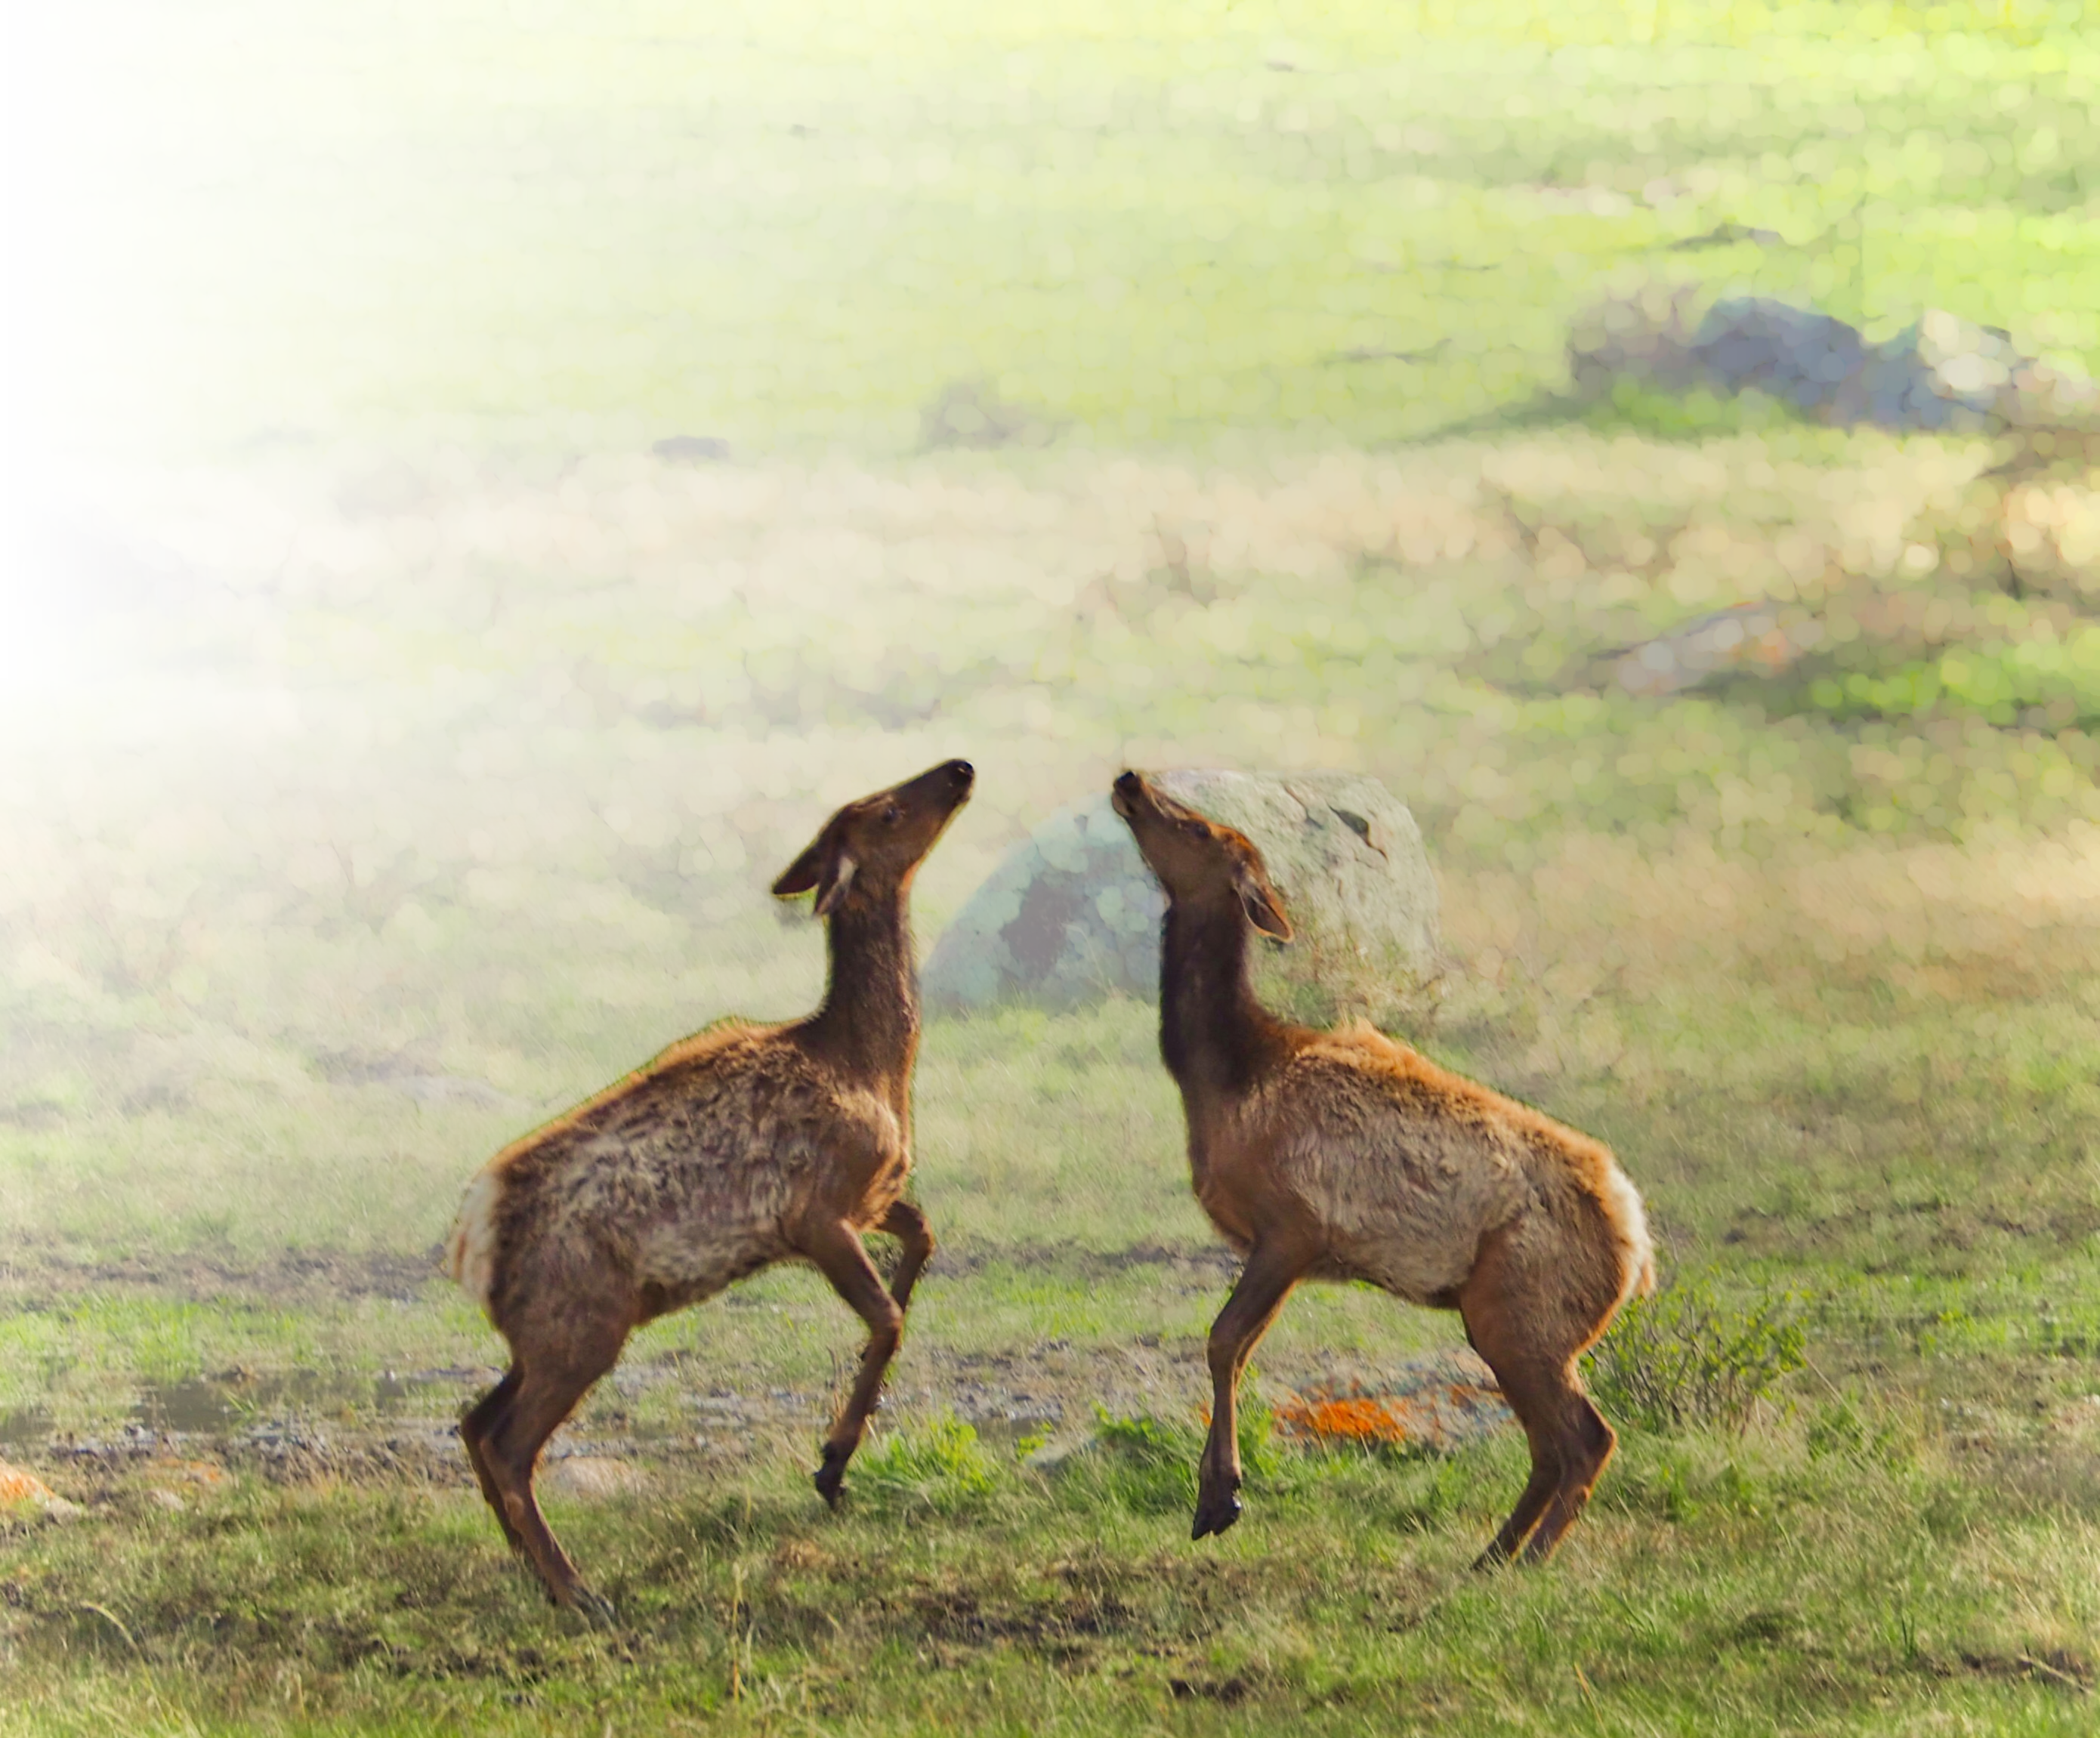
example result
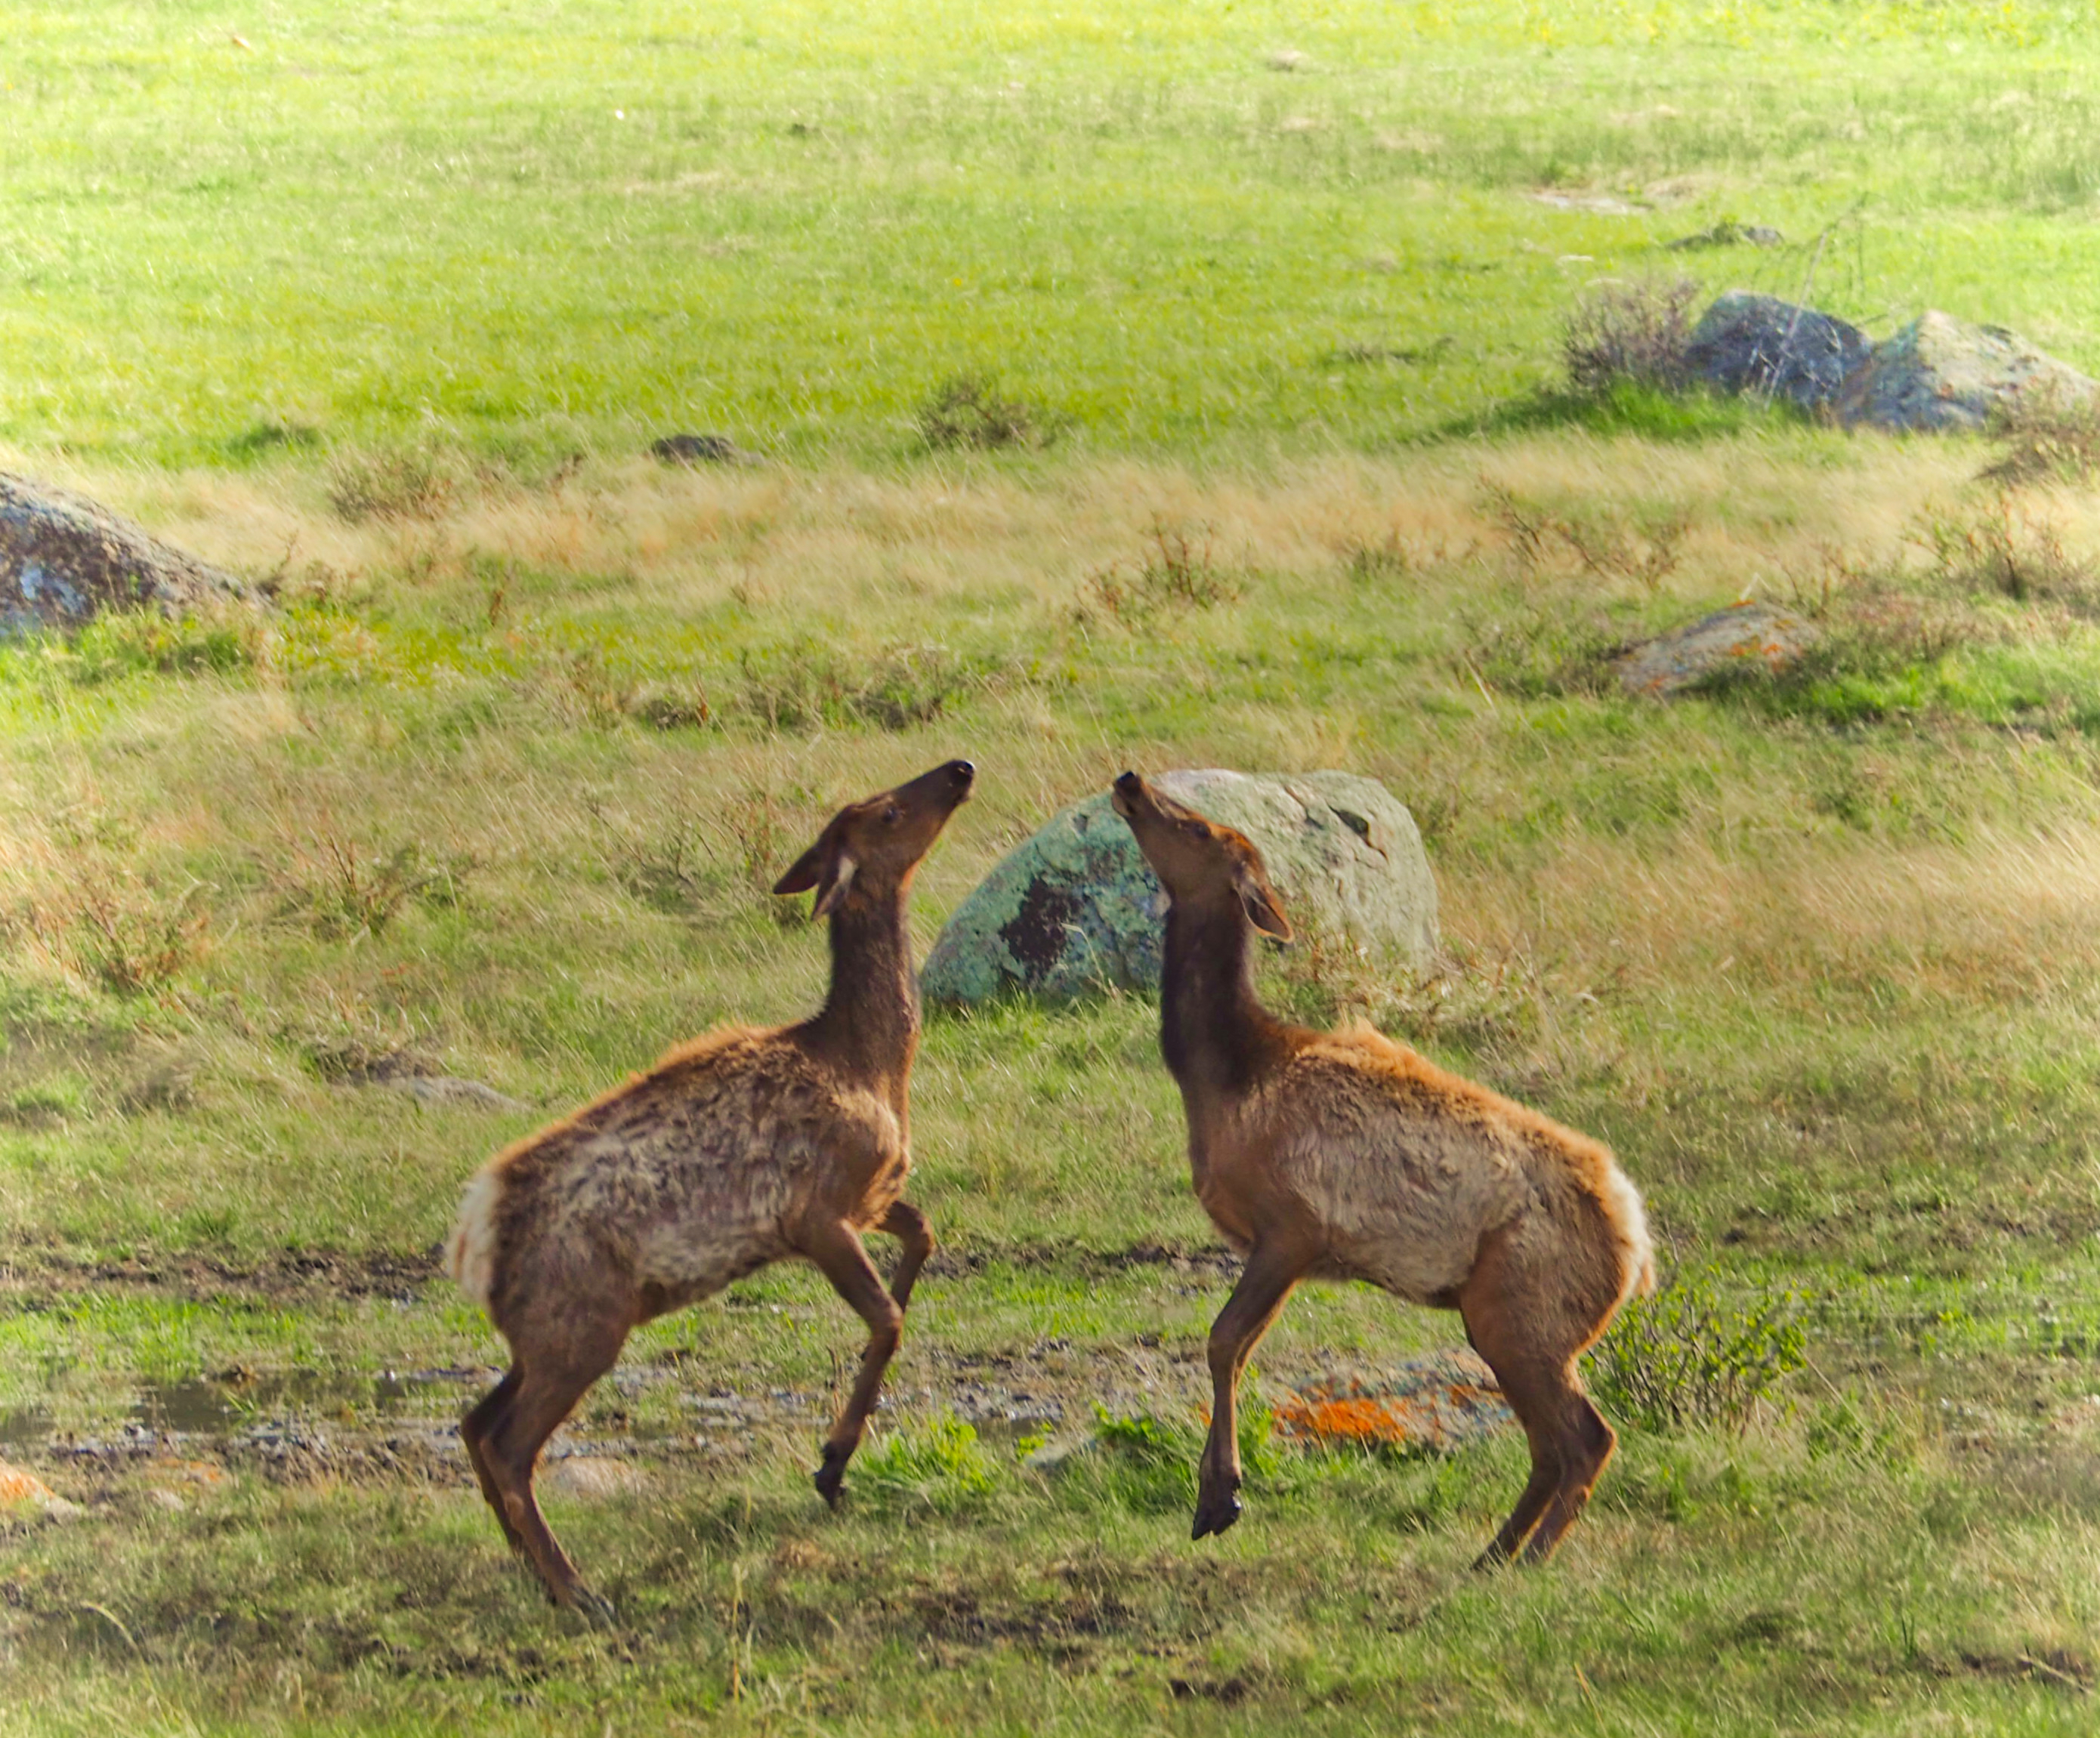
Let's dive into how we can do this. The image (1st pic) in this example is an extreme crop of a photo I captured with the Olympus EM5 II micro-four-thirds (small sensor) camera with a 300mm telephoto lens exposed at f/6.7 and 1/250th second. I only care about the two elk in the foreground here; however the grass and stones behind them are too detailed (and noisy) for my liking. In the result (2nd pic) you'll see that the elk and entire foreground is kept intact. the background gracefully fades into what looks like a "painting" and appears more pleasing. This was created programmatically without any manual input.
intermediate steps
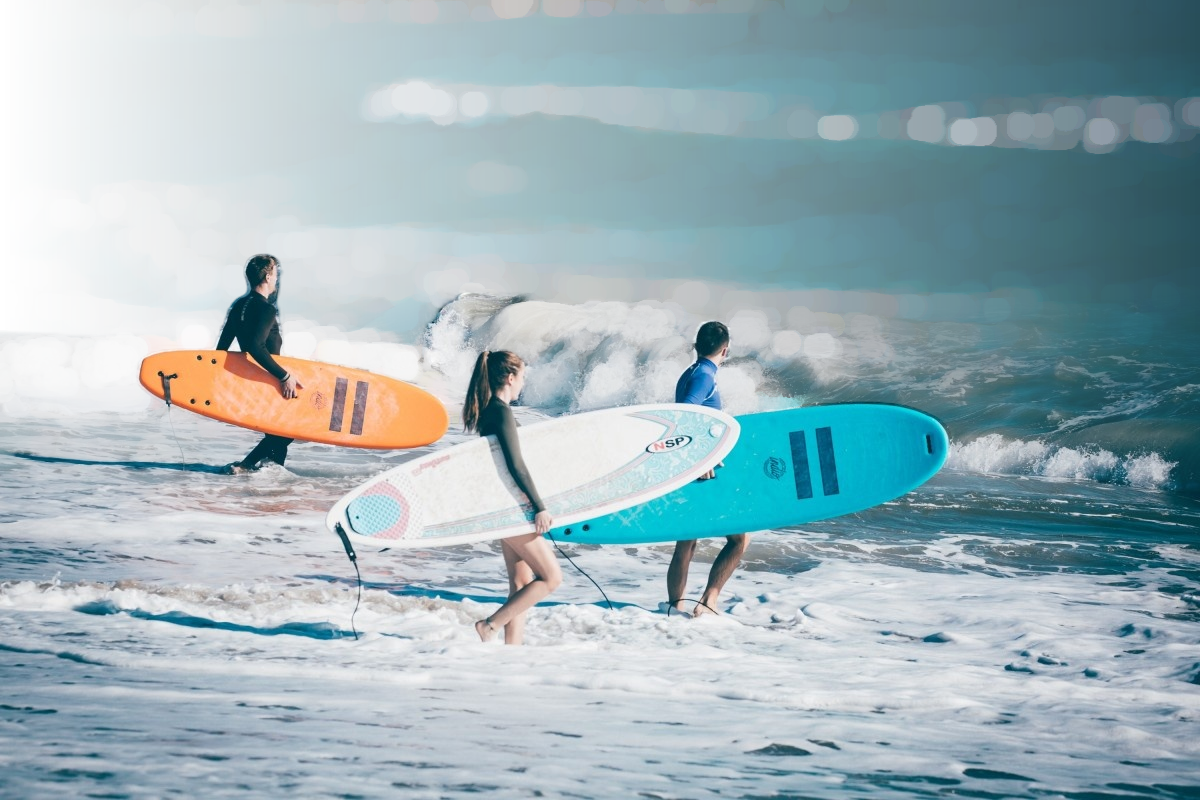
Lets take this photo of surfers below as an example to trace the image processing involved.

I use OpenCV Python bindings create a less detailed watercolor-like version of the image to use later as the background for compositing. We smooth the outline with an ellipse kernel and brighten dark areas. The parameters here are magic numbers tuned to my liking.
import cv2
import numpy as np

# reference: https://stackoverflow.com/questions/60016168/how-to-implement-a-photoshop-like-effect-oilpaint-effect-in-opencv
def to_watercolor_background_img(img : np.ndarray):
    kernel = cv2.getStructuringElement(cv2.MORPH_ELLIPSE, (24,24))
    morph = cv2.morphologyEx(img, cv2.MORPH_OPEN, kernel)
    return cv2.normalize(morph,None,40,255,cv2.NORM_MINMAX)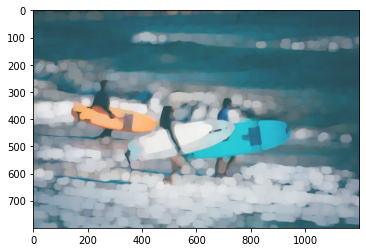
I use a pertained U2net DNN model to detect salient objects in the image. This identifies salient objects in the image. In this case, the surfers and their boards. Potentially we could use this directly as a mask to composite the watercolor background image and the original. But as you can see in the composited result below, the crisp image of the surfers surrounded by the blurry background all-around them looks overtly artificial. This is not how optics works - everything in the focal plane must be crisp. What I'm looking for is a graceful transition. For this, I'll need a depth map.
foreground_image = foreground_detection(input_image)
alpha = Image.open(foreground_image).split()[-1]
foreground_mask = np.array(alpha)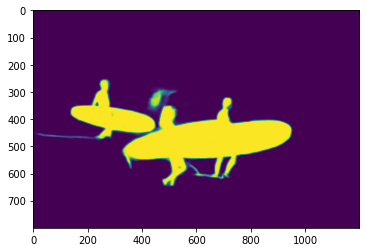
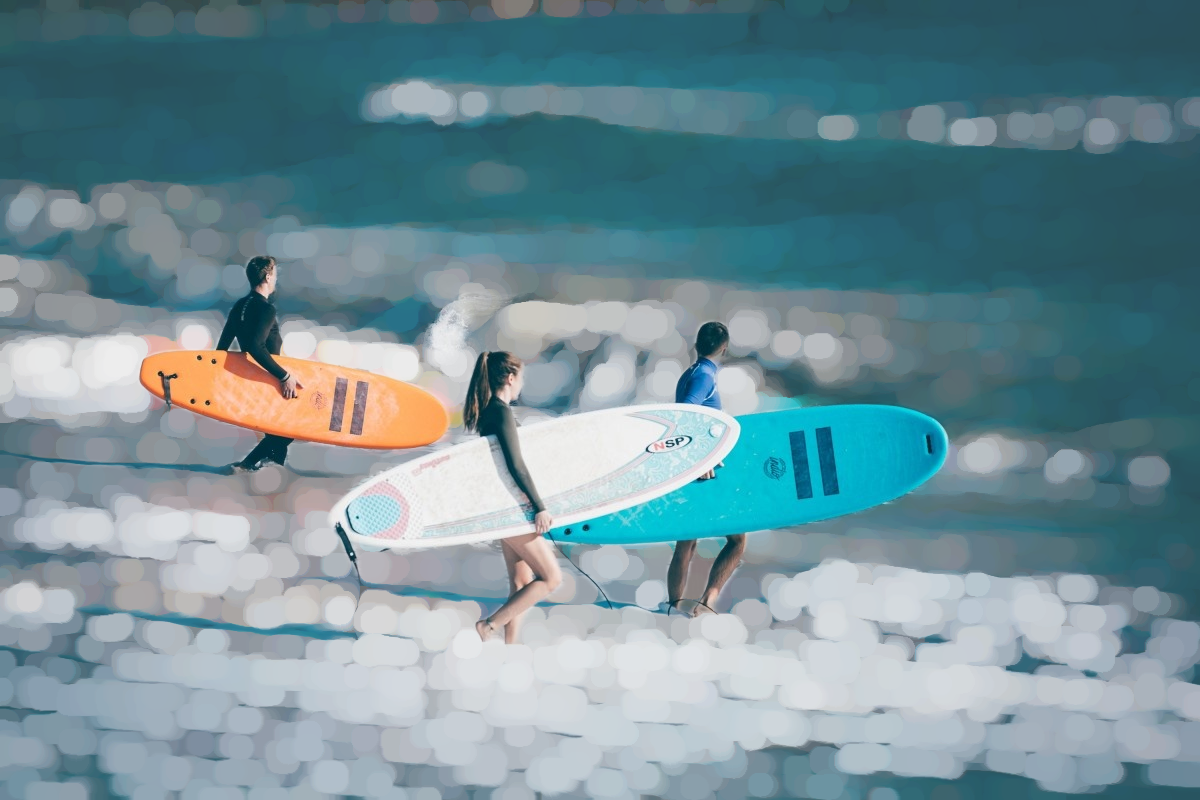
I use a pertained MiDas model to predict the depth map of the 2D (or monocular) image. The model outputs relative inverse depth, which I mix-max normalize so that the closest pixel has a value of 1 and the farthest is at 0. I can now combine this information with the foreground mask from above.
model_type = "DPT_Large"     # MiDaS v3 - Large
midas = torch.hub.load("intel-isl/MiDaS", model_type)
device = torch.device("cuda") if torch.cuda.is_available() else torch.device("cpu")
midas.to(device)
midas.eval()
midas_transforms = torch.hub.load("intel-isl/MiDaS", "transforms")
transform = midas_transforms.dpt_transform

def to_depth_img(img):
    input_batch = transform(img).to(device)
    with torch.no_grad():
        prediction = midas(input_batch)
        prediction = torch.nn.functional.interpolate(
            prediction.unsqueeze(1),
            size=img.shape[:2],
            mode="bicubic",
            align_corners=False,
        ).squeeze()
    return prediction.cpu().numpy()

def normalize_0_1(img):
    tmp = img.reshape(-1)
    tmp = tmp - min(tmp)
    tmp = tmp/max(tmp)
    return tmp.reshape(img.shape)

depth_img = normalize_0_1(to_depth_img(input_img)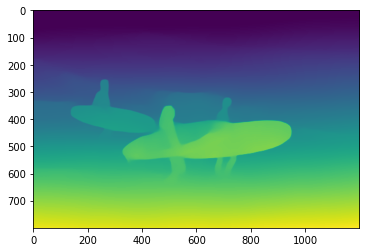
I want to gracefully interpolate (i.e mix) the crisp source image with the blurry background image, so the result looks more "natural" to the eye. I use the normalized depth distribution of the foreground and background pixels to determine where to start and end this interpolation. I start at 50th percentile of the foreground mask depth and stop at the 50th percentile of the background mask depth. Within that range, the normalized depth value is used to combine the two images. Above that range (front), the original image is displayed, and below (back) it is the soft background. The 50th percentile values are just magic numbers; different values or non-linear functions for interpolation weighting might work better for different photos. Notice how the interpolation mask below does not have hard boundaries found in the foreground mask. The mask extends beyond the surfers and gradually fades away.
interpolation_start_depth = np.percentile(foreground_depth_flat[foreground_depth_flat!=0],50)
interpolation_stop_depth = min(interpolation_start_depth, np.percentile(background_depth_flat[background_depth_flat!=0],50))
interpolation_width = interpolation_start_depth - interpolation_stop_depth

def squish(depth_val):
    if depth_val>interpolation_start_depth:
        return 1.
    elif depth_val <= interpolation_stop_depth:
        return 0.
    return min(1., (depth_val - interpolation_stop_depth)/interpolation_width)

# Since the depth map and the foreground map often disagree on the traced edges
# of objects, I add the normalized foreground mask to the depth mask to increase
# the weight for the foreground pixels.
interpolation_mask = np.ndarray(np.vectorize(squish)(foreground_mask + depth_img).shape)
The image composite with this new mask (1st pic below) IMO is better than the previous composite result. The shallow water in the front is crisp, so are the surfers and then the focus falls off more gracefully, revealing the soft background. Adding a right to left alpha gradient to the background image can (sometimes) create a more pleasing, "dreamy" result (2nd pic below); this is optional and a subjective preference. Save for the jagged edges around a couple of the surfers' heads I am happy with the result.
from PIL import Image
result_without_grad = Image.composite(input_img, background_img, interpolation_mask_img)

background_img.putalpha(horizontal_gradient)
result_with_grad = Image.composite(input_img, background_img, interpolation_mask_img)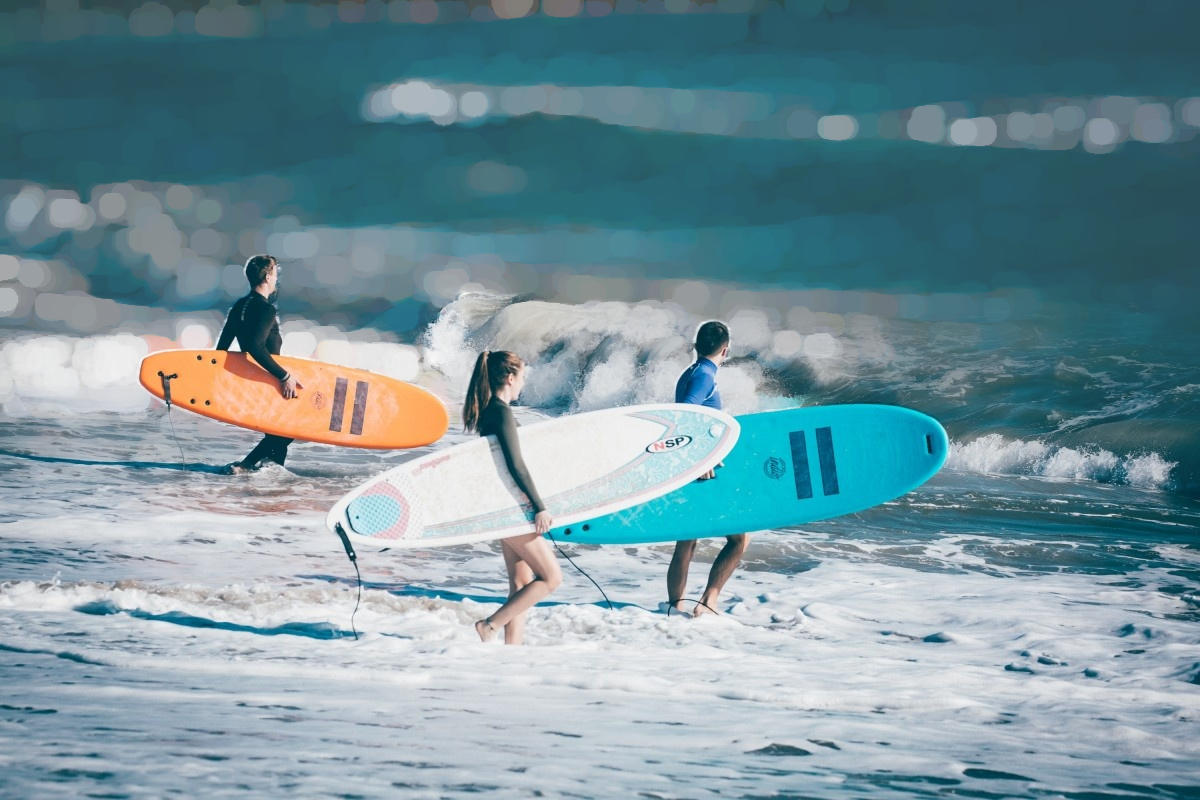
qualitative analysis
About 70% of the images I tried looked good or great to me. The rest I would characterize as poor or less than perfect results. These are the main failure modes:
- low resolution input images or tiny subjects have poor foreground masks. These are typically an issue with extreme crops. Upscaling the image may alleviate these issues.
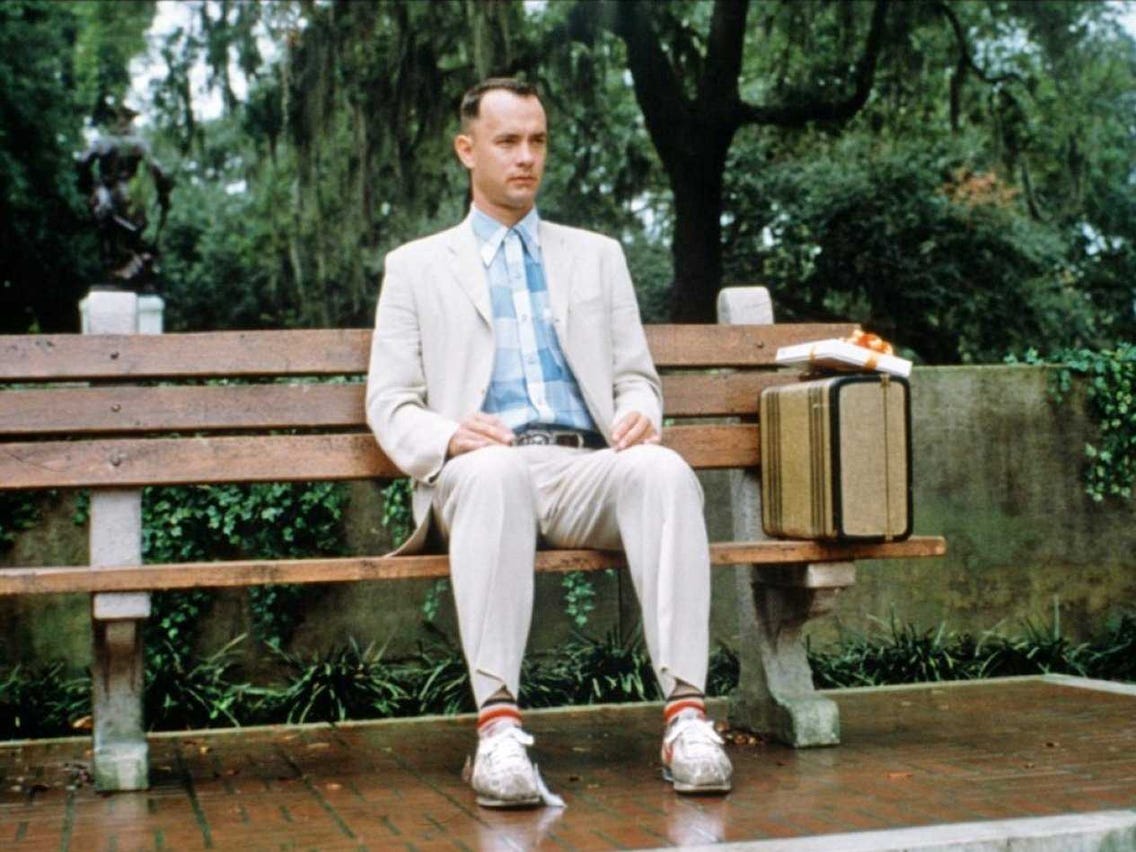
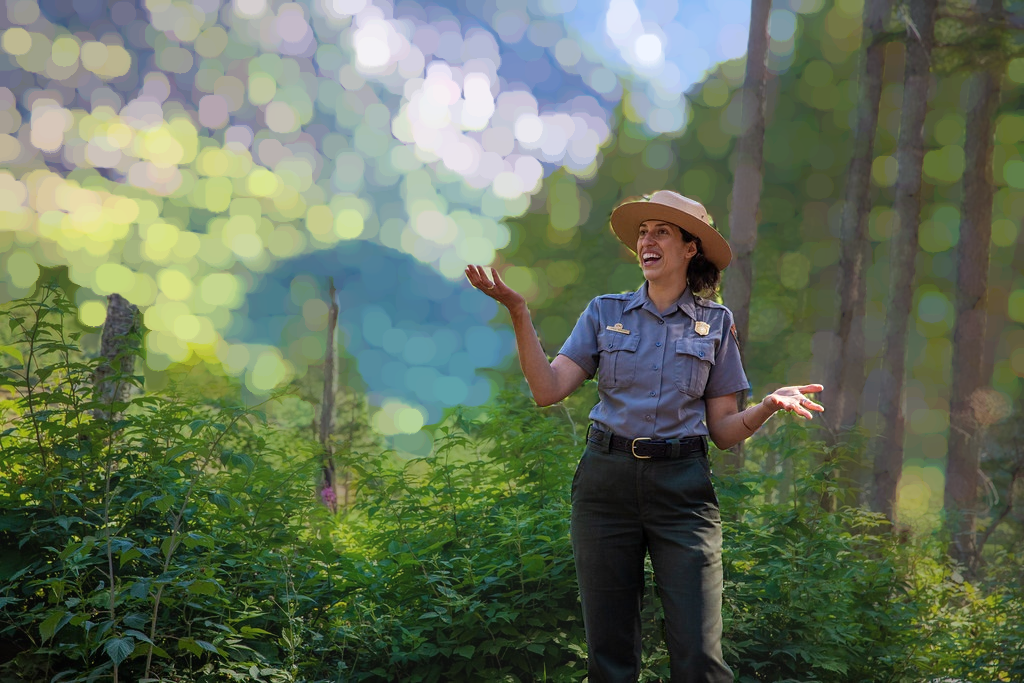
- lack of background detail in the input. These methods only make sense when the image is busy to begin with. When there is plenty of foreground-background separation already, a crisp foreground against an utterly blurry background looks unnatural. See the park ranger example below.
- The salient object detection model is far from perfect. Any mistakes in identifying objects (partially identified objects or misidentified objects) leads to unnatural results. See the buddha image below where the statue's body is blurry but the face isn't.


less is more
One might think that characterizing this as "enhancing" the image is a bit dubious. It is in part a subjective claim. However, consider that we are conditioned to believe that one often needs to add something extraneous to enhance. But, the definition of enhance is plainly to improve the quality or value of something. There is beauty in simplicity; hence removing detail in a photo counts as enhancement. Simple - if something doesn't add up in your photo start subtracting.
Cheers,
Sesh